How To Share Data On Cell C | In 4 Easy Steps
I am excited to talk about something super handy – sharing your Cell C data with friends or family when they need it. I’ve been through those times when I had plenty of data while someone close to me had none. It felt great to help out by sharing some of my data with them. Cell C makes this really easy to do, and I want to help you understand How To Share Data On Cell C too.
Imagine you’re having a great day, scrolling through your favourite social media, and you get a message from a friend. They’re out of data and can’t watch their favourite show or chat online. You think, “Hey, I can share some of my Cell C data with them!” But how do you actually do it? That’s exactly what I’ll show you. We’ll go through each step together, from making sure you’re ready to share, to sending that precious data to your friend’s phone.
By the end, you’ll be all set to spread a little happiness by sharing your data whenever a friend is in a pinch. Let’s get started and make sure you’re the hero the next time someone needs a little data boost!
How To Share Data On Cell C

We need to make sure we can share our data. Both of us need to be using Cell C, and I’ve got to have enough data to share. It’s really easy, and I’ll walk us through every step, so we can both keep chatting and browsing without a hitch.
Accessing the Data Sharing Feature
First up, we need to get to the right spot where we can start sharing our data. I found two ways to do this:
- Using the Cell C App: I just opened the app on my phone, logged in, and tapped on the “Data Sharing” option. Easy peasy!
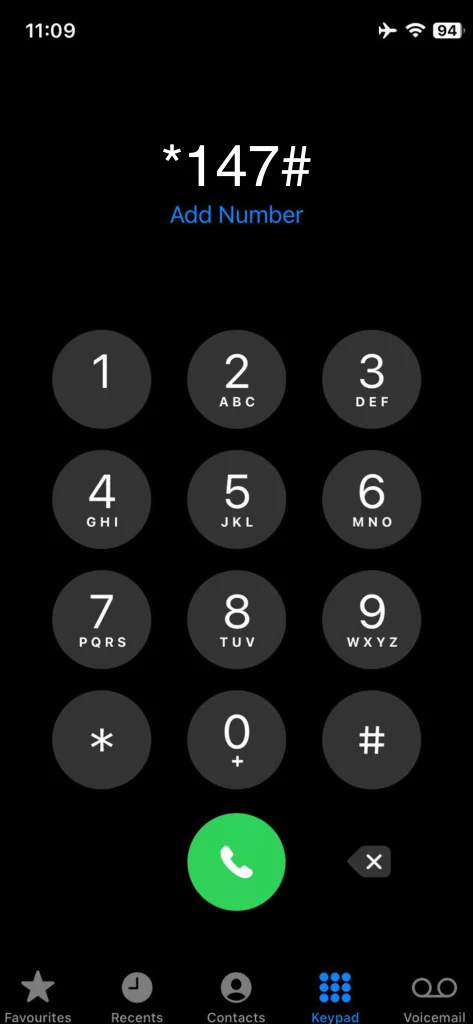
- Using USSD Codes: This one’s a bit old school but works like a charm. I dialled *147# from my Cell C phone, and a menu popped up. From there, I just followed the prompts to get to the data sharing option.
Selecting Recipients
Now, who do we want to share our data with? Here’s how I picked:
- From Contacts: If they’re already in my contact list on the app, I just selected their name. Super simple.
- Manually Entering: If they weren’t in my contacts, no sweat. I just typed in their Cell C number manually.
Choosing the Amount of Data to Share
This part’s important because we don’t want to give away all our data, right? I thought about how much data my friend might need and how much I could spare. Then, I just selected the amount I wanted to share from the options given.
Confirming and Completing the Transaction
Almost done! The last step was just making sure everything looked right. I checked the recipient’s number and the amount of data I was sharing. Then, I hit “confirm,” and voila! Both my friend and I got a message saying the data had been shared successfully.
And that’s it! Sharing data on Cell C turned out to be super straightforward. Now, I can help my friends stay connected, and you can too!
Related : How To Get Cell C ESIM
Troubleshooting Common Issues
Failed Transactions
Sometimes, when I tried sharing data, it just didn’t go through. A couple of things I checked were:
- Enough Data: I made sure I had enough data to share. It sounds simple, but it’s easy to overlook!
- Active Service: I checked that both our Cell C services were active and not barred for any reason.
If everything seemed fine but it still didn’t work, I just waited a bit and tried again. Sometimes, the network might be busy.
Data Not Received
It’s a bummer when you share data, and your friend says they didn’t get it. Here’s what I did:
- Confirmation Messages: First, I made sure I got the confirmation message saying the data was shared. No message usually means the transaction didn’t go through.
- Check Data Balance: I asked my friend to check their data balance. Sometimes the data is there, but they might not have noticed.
- Transaction History: I also checked my transaction history in the Cell C app to make sure the data was sent to the right number.
USSD Code Errors
Ah, the good old USSD codes. They’re handy but can be tricky. If I got an error, here’s what I tried:
- Re-enter USSD Code: Sometimes, I just mistyped the code. I made sure to enter it correctly: *147#.
- Network Glitch: If the code was right but still didn’t work, it might have been a network issue. I waited a bit and then tried again.
- Customer Support: And when all else failed, I gave Cell C’s customer support a ring. They were pretty helpful in sorting things out.
Technology can be a bit finicky at times, but with a little patience and these tricks up your sleeve, you’ll be sharing data like a pro in no time!
Conclusion
I’ve learned about sharing data on Cell C. I found it super helpful for keeping me and my friends connected, especially when one of us runs low on data. Just remember to check you’ve got enough data to share, and make sure both phones are on Cell C.
Following the steps I mentioned should make sharing data really straightforward. And if you hit a snag, don’t sweat it. A little patience and maybe a quick call to Cell C support can sort out most issues. Sharing data is all about staying connected, and I’m all for making that easier. Give it a go, and you’ll see how simple and handy it can be!
FAQs
Can I share my data with anyone on Cell C?
Yes, you can share your data with any Cell C subscriber. Just make sure both you and the recipient have active Cell C numbers. It doesn’t matter if it’s prepaid, postpaid, or a data-only plan; you can share your data as long as you have enough balance to do so.
Is there a limit to how much data I can share at one time?
Yes, there’s a limit to how much data you can share in one go, but it depends on your current data plan and the policies of Cell C at the time. It’s always a good idea to check the latest guidelines on the Cell C App or Website to know the current limits.
How long does it take for the shared data to reflect in the recipient’s account?
Shared data usually shows up in the recipient’s account almost instantly. However, during peak times or technical glitches, it might take a bit longer. If the data doesn’t show up within a few hours, it’s worth checking both accounts and maybe even getting in touch with Cell C support.
Does shared data expire?
Shared data will adhere to the expiry date of the original data bundle from which it was shared. For example, if you share data from a bundle that expires in 30 days, the shared data will also have the same expiry timeline. Always keep an eye on expiry dates to make the most of your shared data.
